Dùng Python thực hiện SSH & cấu hình trên thiết bị mạng bằng Netmiko (phần 1 )

Gồm 1 Switch cisco giả lập trên gns3 và 1 máy PC có cài PyCharm.
#config terminal
(config)#hostname SW1
(config)#ip domain-name vnpro
(config)#crypto key generate rsa
The name for the keys will be: SW1.vnpro
Choose the size of the key modulus in the range of 360 to 4096 for your General Purpose Keys. Choosing a key modulus greater than 512 may take a few minutes.
How many bits in the modulus [512]: 1024
% Generating 1024 bit RSA keys, keys will be non-exportable...
[OK] (elapsed time was 0 seconds)
(config)#enable password 321
(config)#username admin password 123
(config)#line vty 0 4
(config-line)#login local
(config-line)#transport input all
(config-line)#exit
(config)#ip ssh version 2
1.2/ Cấu hình IP cho interface Ethernet0/0:
SW1(config)#interface Ethernet0/0
SW1 (config-if)#no switchport
SW1 (config-if)#ip address dhcp
SW1 (config-if)#no shutdown
SW1 (config-if)#exit
- Thực hiện kiểm tra địa chỉ IP của interface Ethernet0/0:
SW1#show ip interface ethernet0/0
Ethernet0/0 is up, line protocol is up
Internet address is 192.168.168.154/24
Broadcast address is 255.255.255.255
Address determined by DHCP
Yêu cầu cần : Đã cài phần mềm Putty
2.1/ Thực hiện kiểm tra kết nối SSH vào PC:
Mở phần mềm Putty :
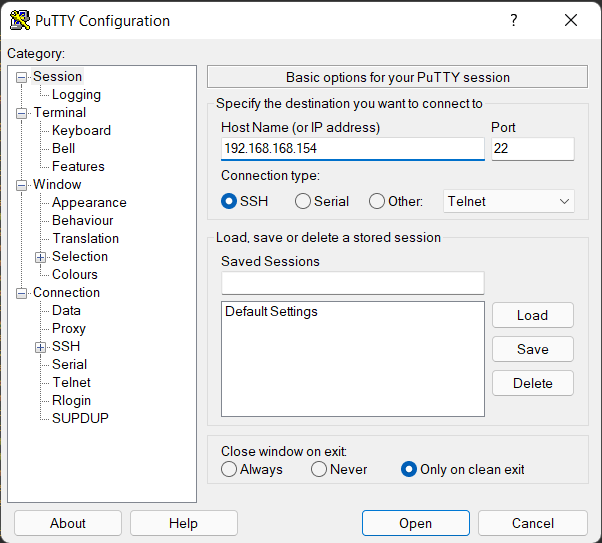
+ Tại HostName (or IP address) nhập địa chỉ interface Ethernet0/0:
192.168.168.154
+ Tại Connection type chọn phương thức kết nối là SSH
+ Chọn Open

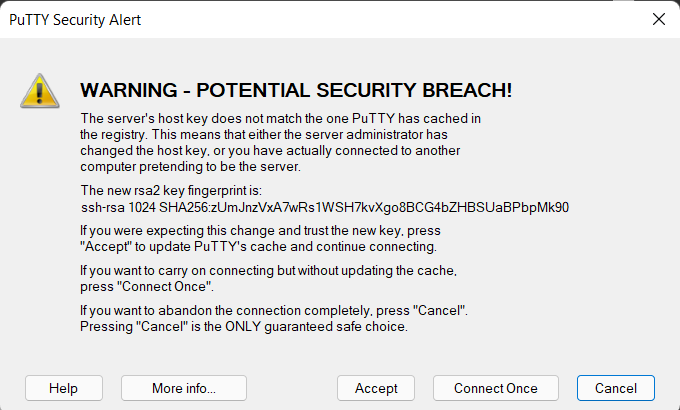
Xuất hiện bảng cảnh báo, Chọn Accept.

Điền username tại login as: admin
Điền password: 123
Password enable : 321

- Như vậy ta đã cấu hình ssh và từ máy PC đã kết nối ssh vào switch thành công.
2.2/ Tạo 1 project và cài đặt thư viện netmiko:
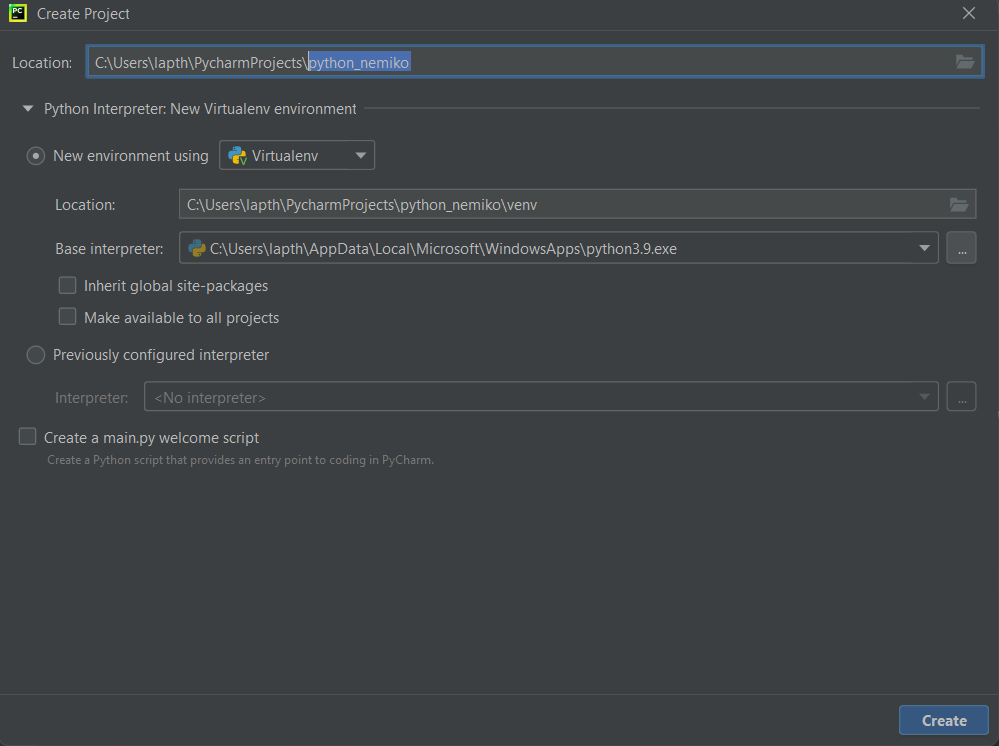
+ Mở PyCharm, Chọn File à Chọn New Project

+ Tại Location : Chọn nơi lưu và tên project mới.
Ở đây, ta tạo projcet mới là python_netmiko.
Có thể tạo sẵn 1 file main.py bằng cách tích vào “Create a main.py welcome script”.
+ Chọn Create.

2.2.2/ Cài đặt thư viện Netmiko:
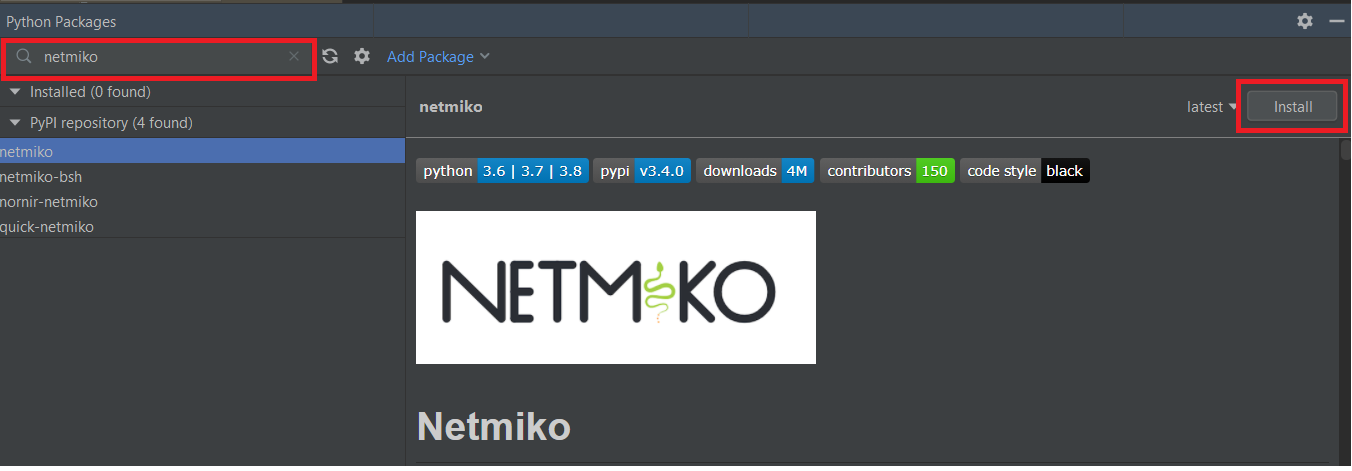
+ Chọn Python Packages
![]()
+ Nhập vào thanh tìm kiếm : netmiko à Chọn Install.
 + Cài đặt thành công netmiko vào project:

Thông tin khác
- » WIFI 6 (18.03.2022)
- » Top 10 sự cố ngừng hoạt động lớn nhất năm 2021 (17.03.2022)
- » CÁC THAO TÁC TRONG FILE PYTHON (17.03.2022)
- » IF ELSE TRONG PYTHON (17.03.2022)
- » LAB: Viết chương trình dùng ngôn ngữ Python và thư viện Netmiko để thực hiện truy cập SSH vào thiết bị mạng Cisco router (17.03.2022)
- » Sự khác nhau giữa Ethernet II và IEEE 802.3 (16.03.2022)
- » ISE and Python (15.03.2022)
- » Ưu điểm của Phát triển phần mềm Agile (15.03.2022)


